Insert vector graphics
 | Use Standard > Import Graphic to import vector graphic or bitmap image into current design |
|---|---|
 | Use View > Show Vectors to show or hide any vector artwork included in the design. Right-click for settings. |
Vector graphics from third-party applications can be inserted into EmbroideryStudio in a variety of native and interchange vector formats. You can also import some vector graphics as bitmaps. You can convert vector graphics to embroidery objects using a variety of input methods or with the Auto-Digitizing tools.
To insert a vector graphic...
Create a new file in EmbroideryStudio or open the design file into which you want to insert the vector graphic.
Click the Import Graphic icon or select File > Import Graphic.
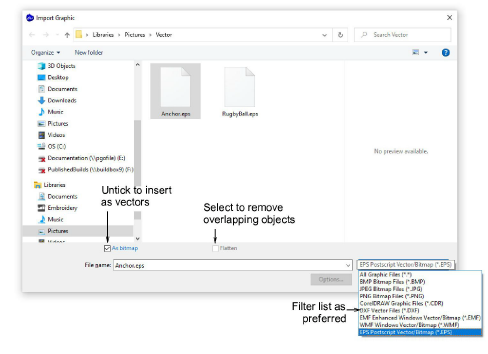
- Navigate to the graphics folder. The dialog defaults to ‘All graphic files’ which displays all supported file types – BMP, PNG, EPS, etc. Change the Files of type setting if you want to filter on a specific file type – e.g. EPS.
Note
While ‘All Graphic Files’ includes both vector and bitmap formats, for native CDR and other vector file types, use the CorelDRAW® Graphics Suite import function.
- If you are working with DXF files:
- Click Options. The DXF File Options dialog opens.
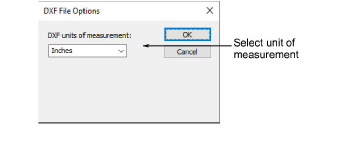
- Select Inches or Millimeters from the Units of Measurement list and click OK. If this information is not specified, the vector graphic may not display at the correct size.
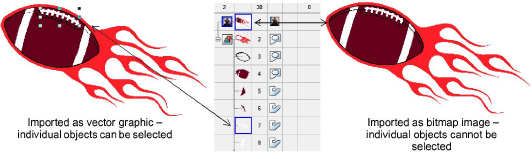
- Select the As Bitmap checkbox to insert the vector graphic as a bitmap image.
Note
DXF files cannot be imported as bitmaps.
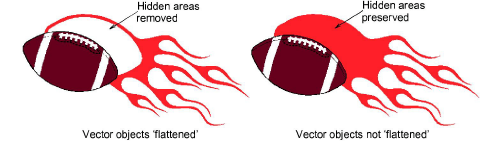
- Select the Flatten checkbox to remove any overlapping areas from the vector graphic.
Select the Preview checkbox to see a preview of the vector graphic.
Click Open to insert the vector graphic into the design window.
TIP
You can also paste vectors directly into EmbroideryStudio through the MS Windows® clipboard.