Manage fabrics
In addition to predefined fabric settings, you can create your own custom fabrics to suit particular needs. You can also modify, rename or delete custom fabrics.
To create a new fabric...
- Select Setup > Manage Auto Fabrics.
If you already have custom fabrics defined, you have the option of editing, renaming, or deleting.
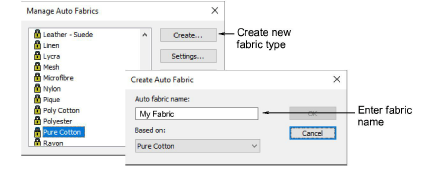
To create a new fabric type, click Create.
Enter a new fabric name. If you want to base the new fabric on default settings, select blank.
Click OK.
The Auto Fabric Settings dialog opens. This dialog allows you to set the fabric values for four object groups – Tatami/Program Split, Wide Satin, Narrow Satin, and Lettering – as well as enter details of any recommended stabilizers.
To set tatami/program split values...
- Click the tab to access Tatami/Program Split Fill settings. These will become the defaults for Tatami and Program Split objects.
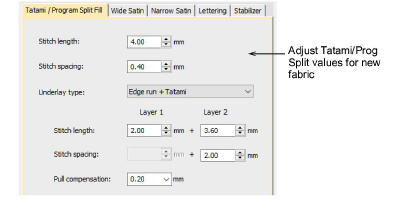
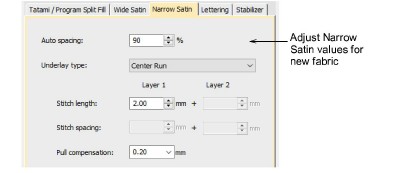
- Adjust Length and Spacing settings for your Tatami / Program Split Fill objects as required:
- Tatami stitch consists of rows of run stitches and is suitable for filling large, irregular shapes. See Tatami stitching for details.
- Program Split is a decorative stitch type. Use it to fill wide and large areas with artistic effects while keeping the appearance of a solid field of stitching. See Creating textures with program splits for details.
- Set a suitable underlay type for Tatami/Program Split objects. See Stabilizing with automatic underlay for details.
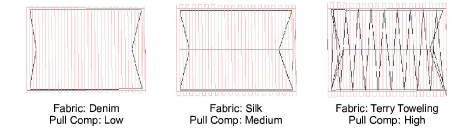
- Set a pull compensation allowance for these objects. See Compensating for fabric stretch for details.
To set satin object values...
- Click the tab to access Wide Satin settings. These settings will become the defaults for larger Satin objects.
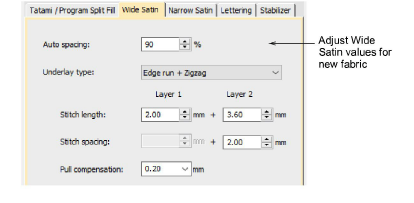
- Adjust the Wide Satin settings as you did for Tatami / Program Split objects. See Satin stitching for details.
Instead of Stitch Length and Stitch Spacing settings, you have a single density setting which is controlled by a slider bar.
- Click the tab to access the Narrow Satin settings and adjust as you did for Wide Satin objects. Generally, narrow objects will require a different underlay type. See Satin stitching for details.
To set lettering object values...
- Click the tab to access Lettering settings.
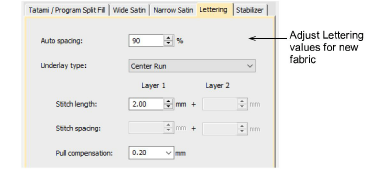
- Adjust settings as you did for Satin objects. See Applying stitch types & effects to lettering for details.
To set stabilizer settings...
- Click the tab to access Stabilizer settings.
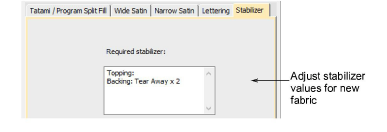
- Key in one or more recommended stabilizer(s) together with a description or any other relevant information for the custom fabric. This information will be displayed in the Choose Fabric dialog. See Change fabrics for details.