View control points
 | Use Reshape > Reshape Object to reshape selected objects, edit stitch angles, and adjust entry/exit points. |
|---|---|
 | Use Reshape Views > Show Reshape Nodes to toggle on/off reshape nodes for selected objects. |
 | Use Reshape Views > Show Bézier Handles to toggle on/off Bézier handles for selected objects. |
 | Use Reshape Views > Show Stitch Angles to toggle on/off stitch angles for selected objects. |
 | Use Reshape Views > Show Entry/Exit Points to toggle on/off entry/exit points for selected objects – respectively, green diamond and red cross markers. |
The Reshape Object tool is important in EmbroideryStudio. Use it whenever you want to change object shapes. Use it also to edit stitch angles as well as entry and exit points.
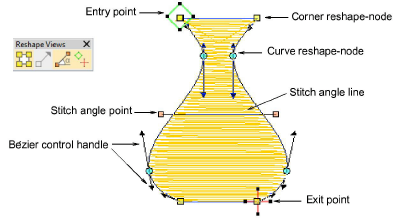
To view control points...
- Select an object and click Reshape Object. Control points appear together with Reshape Views toolbar.
TIP
Most control points can be added, deleted, or moved. Corner and curve points can be swapped. Entry/exit points, however, cannot be deleted.
- Use the Reshape Views toolbar to selectively display control points.
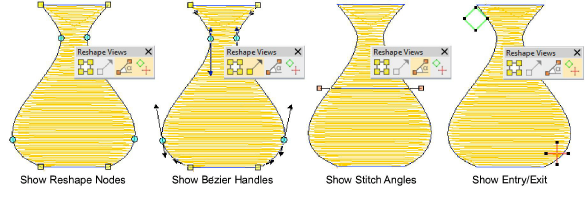
- Show Reshape Nodes: Use hotkey combination Alt+N to toggle. See Reshape objects with reshape-nodes for details.
- Show Bézier Handles: See Reshape objects with Bézier controls for details. See also Reshape options.
- Show Stitch Angles: Use hotkey combination Alt+A to toggle. See Adjusting stitch angles for details.
- Show Entry/Exit: See Adjust entry/exit points for details.
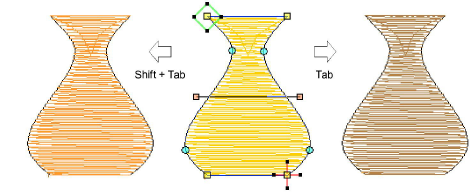
- To view next or previous objects, press Tab or Shift+Tab keys. Any changes to objects are confirmed.