Adjust curved baseline settings
 | Use Toolbox > Lettering to adjust baseline settings. |
|---|
Adjust baseline settings for more precise numeric control over radius (X and Y), as well as tilt, justification, and arc angles.

To adjust curved baseline settings...
- Double-click a selected lettering object/s to access object properties.
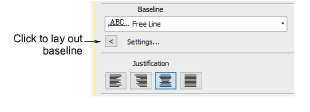
- Click Settings. The Baseline Settings dialog opens. Options depend on baseline type.
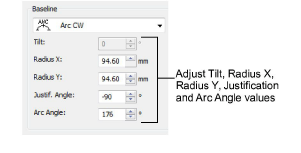
Select a circle or arc baseline type from the list. The Tilt, Radius X, Radius Y, Justification Angle and Arc Angle fields are activated.
Adjust these values as required:
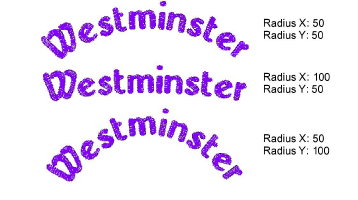
- Radius X: default radius of the baseline arc (X-axis).
- Radius Y: default radius of the baseline arc (Y-axis).
- Tilt: angle of the baseline relative to the horizontal axis.

Note
The Tilt field is activated when Radius X and Radius Y values are different.
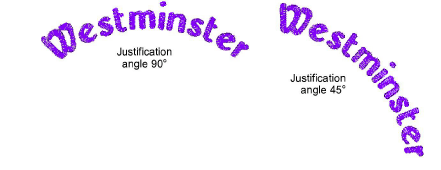
- Justification Angle: angle of the vertical axis through the lettering object relative to the horizontal axis.
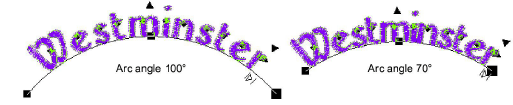
- Arc Angle: angle between radii connecting ends of baseline to center of arc. This constrains the baseline so the text falls within the arc specified.
TIP
Precise control over baseline width is important when combined with Team Names when you want to ensure all names fit within the same area such as a pocket. A fixed width on arch baselines can be set by adjusting Arch Angle value in the Baseline panel.
- Select a baseline position.

When digitizing lettering for a badge, for example:
- For lettering above, select a clockwise circle or arc with baseline below.
- For lettering below, select a counterclockwise circle or arc with baseline above.
- For horizontal lettering through the middle of the badge, select a fixed line with baseline centered.
For fixed-line baselines, select an ‘auto-frame’ style.
Specify the letter, word and line spacing as required.
Select a letter orientation.
Click OK to return to Object Properties > Special > Lettering docker.