Reshape letters
 | Use Reshape > Reshape Object to reshape individual letters on screen. |
|---|
Create special lettering effects by reshaping letter outlines with the Reshape Object tool.
To reshape letters...
Select the lettering object and click Reshape Object.
Click the letter outline. Control points appear around the outline. Selectively turn off control points as required.
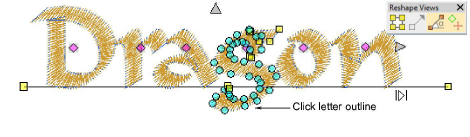
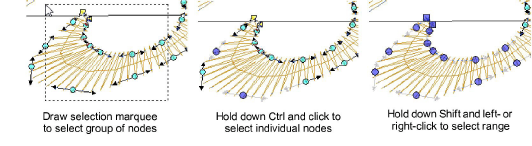
- Select reshape nodes by any of the following means:
- Drag a selection marquee around the reshape nodes you require.
- To select multiple nodes, hold down Ctrl or Shift as you select.
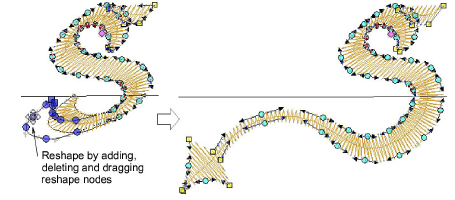
- Reshape the letter like any other object and press Enter.
TIP
Press Spacebar to toggle between selected corner and curve reshape-nodes.
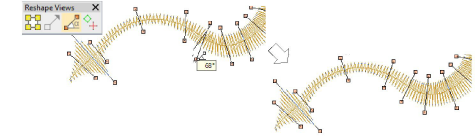
- Adjust stitch angles as required and press Enter.
TIP
Holding down the Ctrl key, click the outline wherever you want to place an additional stitch angle.
- Adjust entry/exit points as required and press Enter.
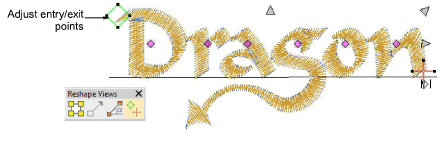
- Press Esc to finish.
Note
Custom fonts are saved in ESA format to in the USERLETW folder within the local EmbroideryStudio installation. If you want to adjust converted characters or add special characters to a custom font, you can do so via the Create Letter function.